Step 1: Open your Outlook and head to the People Section
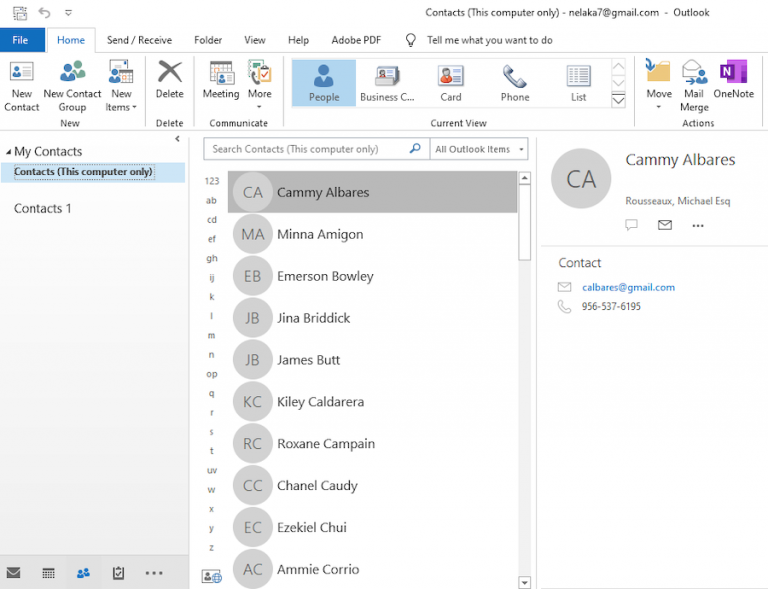
On the left-hand menu, click on 'People.'
After opening Outlook, you need to head to the 'People' section. You can find it in the left-hand menu. Once you're there, you'll see a list of all your contacts. You can either use an existing contact group or create a new one.

Step 2: Create a new Contact Group (if you don't have any existing ones)
In the top menu, click on the 'New Contact Group' button.
If you don't have any existing groups in your Outlook, creating a new one will be your first step. To do this, click on the 'New Contact Group' button in the top menu.

Step 3: Add members to your Contact Group
Type the name of the contacts you want to add.
After creating a new group, you can start adding the members to it. Type the name of the contacts you want to include in the group, and they will appear in the search results. Select the contacts you want to add to your group and click on the 'Members' button.

Step 4: Give your Contact Group a name
Type a name in the 'Name' field at the bottom of the window.
Now that you've added your members to the group, you need to name it. Type a name in the 'Name' field at the bottom of the window. Make it something descriptive that will help you remember what the group is about. Then click on the 'Save & Close' button.

Step 5: Compose your Email
Create and write your email as you normally would.
Now you're ready to compose your email. Click on the 'New Email' button to open a new email window. Compose your email as you normally would. Fill in the subject line, the body of the email, and attach any files you want to include.

Step 6: Add your Contact Group to the email
Click on the 'To' button and select your Contact Group.
Now that you've composed your email, it's time to add your Contact Group to it. Click on the 'To' button in the email window, and select the Contact Group you just created. Then click on 'OK,' and all the members of the group will be added to the email.

Tips for Creating an Effective Group Email
Now that you know how to create a group email in Outlook, here are some tips to help you send an effective email:
- Be concise: Make sure your email is short and to the point. Keep it simple and easy to understand.
- Use a clear subject line: Your subject line should clearly convey the purpose of the email.
- Personalize your message: Add a personal touch to your email to make it more engaging.
- Include a call to action: Tell your recipients what you want them to do.
- Proofread your email: Make sure your email is free of typos and grammatical errors.
Ideas for Creating a Group Email in Outlook
Here are some ideas for creating a group email in Outlook:
- Sending newsletters: Use a group email to send newsletters to your clients or subscribers.
- Scheduling meetings: Use a group email to schedule meetings with your team or clients.
- Sharing important updates: Use a group email to share important updates with your team or customers.
- Collaborating on projects: Use a group email to communicate with your team members on a project and share files and updates.
- Inviting people to events: Use a group email to invite people to an event or occasion.
How Creating a Group Email in Outlook Can Save You Time
Creating a group email can save you a lot of time in several ways:
- Bulk emails: Instead of sending individual emails, you can send a group email in a single go.
- Increase efficiency: You can communicate with your team or clients more efficiently by sending a group email, saving you time and effort.
- Stay organized: With a contact group, you can keep your contacts organized, making it easier to send group emails in the future.
Conclusion
Creating a group email in Outlook is a great way to communicate with a group of people. It can save you time and effort, and help you stay organized. Follow these simple steps to create a group email in Outlook and make sure to use the tips and ideas mentioned above to make your group email effective and engaging.
Find more articles about How To Make A Group Email In Outlook