:max_bytes(150000):strip_icc()/PreparetheWorksheet2-5a5a9b290c1a82003713146b.jpg)
Are you tired of hand-writing labels for your business or personal use? Look no further, because we have the solution for you! How To Make Label From Excel - It's the perfect way to save time and energy, while still maintaining a professional and polished look. In this post, we'll guide you through the process of printing labels from Excel, with tips and ideas on how to make your labels stand out.
Label Design Ideas
1. Simplistic Design
Less is more! A clean and simple design will not only look modern, but it's also easier to read. Choose one or two fonts that complement each other, and use a neutral color palette for a classic and timeless look.
Tip: If you don't have a lot of design experience, Microsoft Word has many templates available for you to use.
2. Eye-Catching Graphics
Want to make your labels stand out in a crowded marketplace? Incorporate eye-catching graphics that represent your brand or product. This is especially effective for food or beverage products, where consumers are drawn in by visuals.
Idea: If you're branding a line of products, create a cohesive look by using similar graphics or colors throughout all of the products' labels.
3. Unique Shapes
Don't be afraid to break out of the standard rectangular label shape! You can purchase label sheets that come in various shapes and sizes, from circles to hearts to stars. A unique shape will grab attention and make your product stand out in a sea of rectangle labels.
How To: When designing your labels, make sure to measure the shape you've chosen to ensure that your design will fit properly.
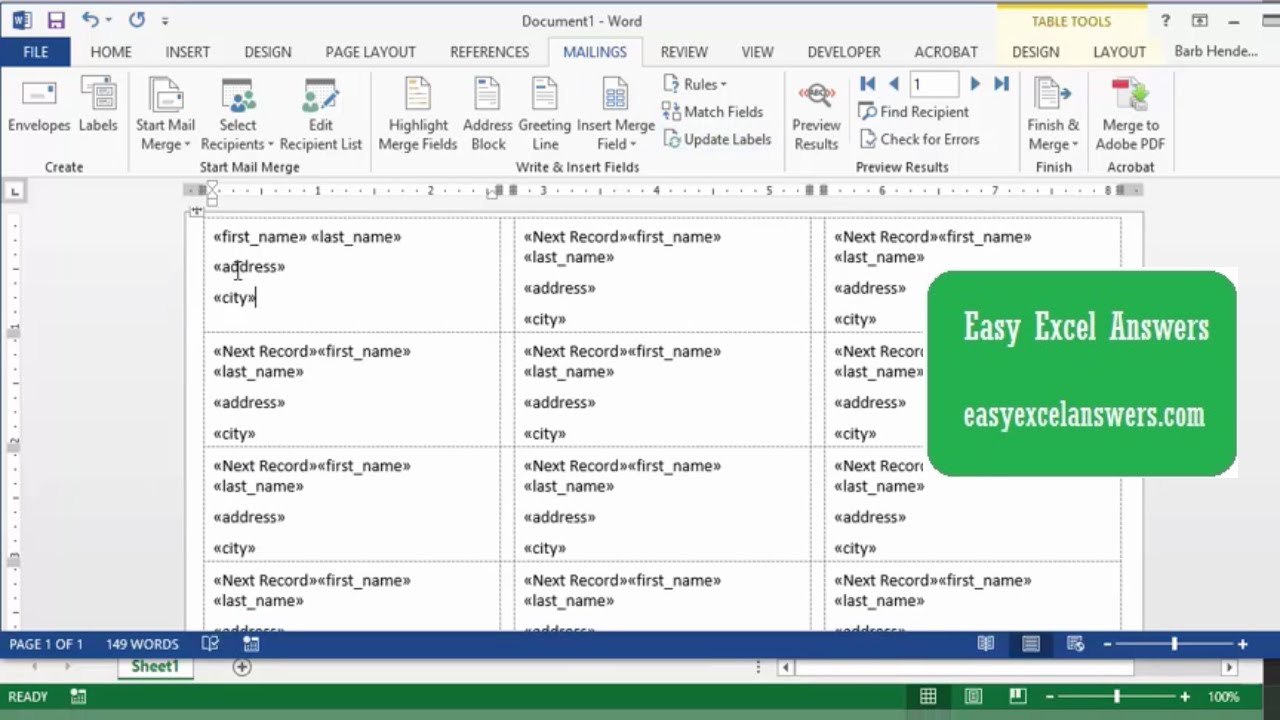
How To Print Labels From Excel
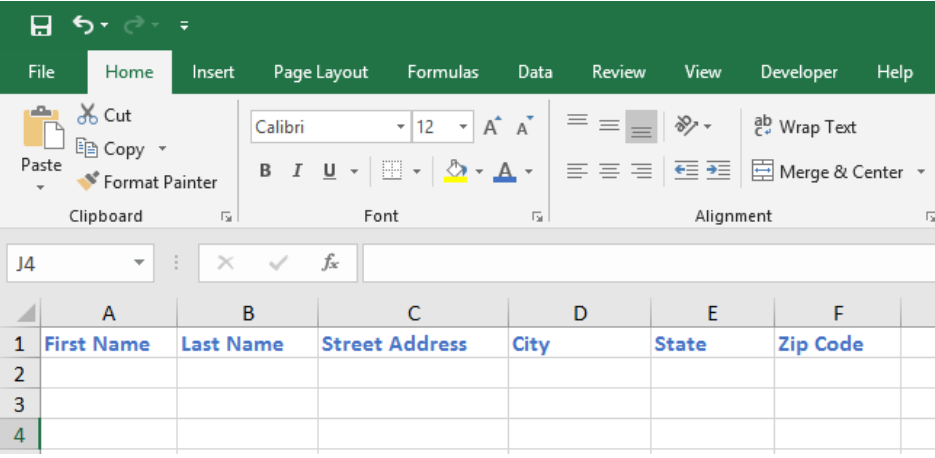
1. Create Your Design in Excel
Open a new Excel worksheet and create a new blank workbook. Create a new worksheet within the workbook and name it "Labels." To help with alignment, use the "gridlines" function in Excel to create cells the size of your label. This will ensure that your designs fit properly on the label sheet.
:max_bytes(150000):strip_icc()/PrepareWorksheetinExcelHeadings-5a5a9b984e46ba0037b886ec.jpg)
Idea: If you have a logo or graphics already created, use Excel's "insert picture" function to add it to your label design.
2. Save and Export Your Label Design
Once you've completed your label designs, save the Excel worksheet. When you're ready to print, go to "File" > "Save As" and select "PDF" as the file type. Make sure to save the PDF to a location that's easily accessible for printing later.
3. Print Your Labels
Now it's time to print your labels! Load your label sheets into your printer, making sure that the labels match the dimensions of the worksheet you created in Excel. Print a test sheet first to ensure that everything lines up properly. Once you've confirmed that the test sheet printed correctly, print as many sheets as you need.
With these tips and ideas, you'll be able to create professional-looking labels that will elevate your business or personal brand. Try different designs, shapes, and graphics to find the perfect look that represents you. Happy labeling!
Read more articles about How To Make Label From Excel