
Oh hey there internet fam! I'm so excited to chat with you today about something that might seem a liiiiittle scary at first, but trust me, it's super easy and I'm gonna walk you through it step by step. We're talking about how to make the background of an image transparent! I know, I know, it sounds like something only super tech-savvy people can do, but I promise you, even your grandma can handle this one. So let's dive in!
Image 1: 71 Create Png Background Images - 4kpng
Step 1: Upload your image
First things first, head on over to the website 4kpng and upload your image. It can be a picture of your dog, your Aunt Karen's lasagna, or even just a cool background you found on Google - doesn't matter!
Step 2: Click on the "Transparent" option
Once your image is uploaded, you'll see a button called "Transparent" towards the top of the screen. Click on it!

Step 3: Download your transparent image
After clicking on "Transparent," you'll see a preview of what your image will look like with a transparent background. If you're happy with it, go ahead and hit "Download PNG" to save it to your computer! Voila! You've just made your image background transparent.

Image 2: How To Make The Image Background Transparent Using GIMP
Step 1: Open your image in GIMP
GIMP is a free photo editing software that can help you make the background of your image transparent. Open up GIMP and navigate to "File" -> "Open" to select your image.
Step 2: Select your image layer
In GIMP, your image will be made up of different layers. You'll want to select the layer that contains the image you want to edit. You can do this by clicking on the layer in the "Layers" panel on the right side of the screen.

Step 3: Use the "Fuzzy Select" tool
With your layer selected, choose the "Fuzzy Select" tool from the toolbar on the left side of the screen. Use this tool to click on the area of the image you want to make transparent. It should select the entire area for you.

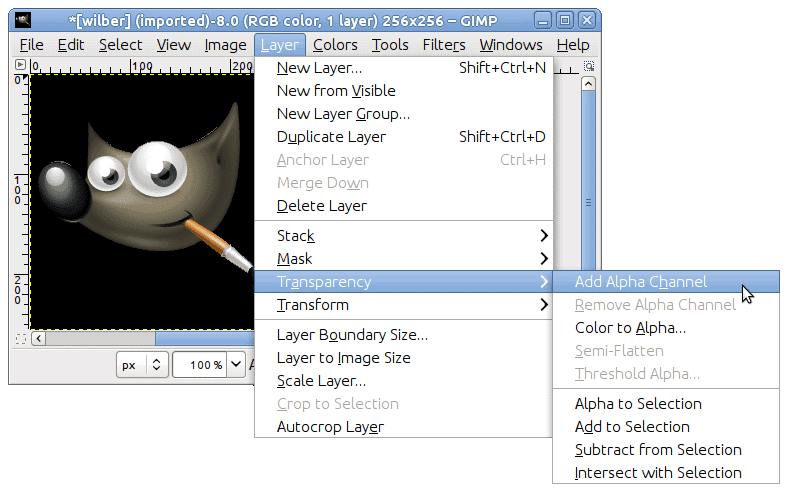
Step 4: Make the selection transparent
With your area selected, navigate to "Layer" -> "Transparency" -> "Add Alpha Channel". This will allow you to make the selected area transparent. Next, hit "Delete" on your keyboard to remove the selected area.

Step 5: Export your transparent image
You're almost done! Navigate to "File" -> "Export As" to export your transparent image as a PNG. Make sure to select the "Save background color" option as "None." Hit "Export" and you're all set!

Image 3: Make logo transparent background png in just 1hrs by Businesspro9
Step 1: Send your logo to Businesspro9
If you're not feelin' confident in your ability to make your logo's background transparent yourself, fear not! There are professionals out there who can do it for you in no time. Head on over to Businesspro9 on Fiverr (link in the image title) and send them your logo. They'll take care of the rest!
Step 2: Wait patiently for 1 hour
While you wait for Businesspro9 to work their magic, spend some time doing something else! Take a walk, make a sandwich, or binge-watch a few episodes of The Office. Time flies when you're having fun.
Step 3: Receive your transparent logo
After 1 hours, you'll receive your transparent logo from Businesspro9. All that's left to do now is show it off to the world!
Image 4: Download High Quality how to make a transparent background illustrator
Step 1: Open your image in Adobe Illustrator
If you have Adobe Illustrator, you can use it to make the background of your image transparent. Open up Illustrator and go to "File" -> "Open" to select your image.
Step 2: Choose your image layer
Your image will be made up of different layers in Illustrator. Select the layer that contains the image you want to edit by clicking on it in the "Layers" panel on the right side of the screen.

Step 3: Select your image
Using the Selection tool, click on your image to select it. You'll see a blue outline around the edges of the image once it's selected.

Step 4: Click on the "Make Mask" button
In the "Transparency" panel on the right side of the screen, click on the "Make Mask" button. This will add a mask to your image.

Step 5: Use the "Brush" tool
Make sure your "Mask" is selected in the "Transparency" panel. Choose the "Brush" tool from the toolbar and use it to paint over the parts of your image that you want to make transparent. You'll see the mask in the "Transparency" panel update in real-time as you paint.

Step 6: Export your transparent image
When you're happy with your image, go to "File" -> "Export As" to export it as a PNG. Make sure to select the "Background Color" as "Transparent" and hit "Export" to save your transparent image to your computer.

Well, there you have it folks! Four different ways to make the background of your image transparent, ranging from super easy to slightly more advanced. No matter which method you choose, the end result will be a glorious, transparent image that can be used in all sorts of fun ways. Happy editing!
View more articles about How To Make Background Of Image Transparent